Post by BALBOSA on Aug 31, 2011 8:01:15 GMT -1
(kindly provided by BOOM HEADSHOT)
Balbosa: i thought this was such a good guide i asked boom headshot if we can publish it on here and he kindly agreed and emailed me it. so here it is guys.
So this afternoon I decided that college work was sh*t, so I went outside and got to work giving my SFW a dusty Afghan look. I have been inspired by others attempts in the past and it was on the to do list, but I have not seen a dedicated guide to it so I thought I would continue not doing what I should and give you guys the low down on how I managed to achieve it.
What will you need?
Tools to take apart parts of your weapon if needed
White spirit or methylated spirits and even nail polish remover
J cloths
Tan spray paint like krylon or the halfords stuff
Nice well ventilated area
Gloves (If you aren't man enough)
Masking tape
Lots of patience and restraint
There is no need to attack it with wire wool or sand paper! that will only ruin the metal and original finish of the weapon, you are mearly trying to leave paint in certain areas.
So to start with I had to remove the original paintjob on the weapon. It had started to wear naturally and it was not too thick, so it did not take too long to remove. Don't worry about getting every last bit off, you want to leave it in the places you cant really get to. The RIS was a pain in particular so I just rubbed over the parts the cloth that I could get at and left it at that.
So I was then left with this

As you can see I removed all the accessories to do separately

The receiver with its original grey Finnish (Note the paint still remaining at the back of the delta ring)

So I then taped up the lenses of the Eotech, and some of the stickers on the PEQ box. I later found that as long as the coating is light there is no real need to cover them up. I then preceded with the second stage which is a tan dusting. I sprayed in sweeping motions about a foot away from the surface and gradually built it up. If you cant see it at first don't blast it full on, it will make it much harder to remove and may ruin the effect if its too thick.
Just after painting.

Close up on how light the coat was.

Other side

Accessories

Another close up with taped over bolt.

The coat should be dry to the touch straight away if done light enough, so it comes off nice and easily for the next part.
I then got straight to work with rubbing it off, re dipped the J cloth in white spirit and got cracking. The paint should naturally stay in places where dust would normally collect, this is where you can decide how dusty you want it too look, with mine I have not left too much, and wanted it to gather in the usual places but also change the surface of the weapons colour to make it more realistic. If you are unsure of how much you want to lave on, don't put so much white spirit on the cloth, as then you can more gradually remove the paint rather than it all coming off and you having to waste paint respraying it.
Right after removing the paint.

Notice the effect it has had on the flat surface a well as where it has gathered and stayed.


I left more in the stock as firstly it was pain in the ass, and secondly it would naturally collect more there because of being rested on the butt, and it being a low contact and usage area.

Other side of the reciever, collected in the trades nicely

Everything put back on.


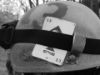
Another hard to reach place.


"To the sand box and back" look, DONE!

I am very pleased with the result and I hope this guide will help others wanting to do the same. Please post up your results and any thoughts and notes you may find in your attempt.
Balbosa: i thought this was such a good guide i asked boom headshot if we can publish it on here and he kindly agreed and emailed me it. so here it is guys.
So this afternoon I decided that college work was sh*t, so I went outside and got to work giving my SFW a dusty Afghan look. I have been inspired by others attempts in the past and it was on the to do list, but I have not seen a dedicated guide to it so I thought I would continue not doing what I should and give you guys the low down on how I managed to achieve it.
What will you need?
Tools to take apart parts of your weapon if needed
White spirit or methylated spirits and even nail polish remover
J cloths
Tan spray paint like krylon or the halfords stuff
Nice well ventilated area
Gloves (If you aren't man enough)
Masking tape
Lots of patience and restraint
There is no need to attack it with wire wool or sand paper! that will only ruin the metal and original finish of the weapon, you are mearly trying to leave paint in certain areas.
So to start with I had to remove the original paintjob on the weapon. It had started to wear naturally and it was not too thick, so it did not take too long to remove. Don't worry about getting every last bit off, you want to leave it in the places you cant really get to. The RIS was a pain in particular so I just rubbed over the parts the cloth that I could get at and left it at that.
So I was then left with this
As you can see I removed all the accessories to do separately
The receiver with its original grey Finnish (Note the paint still remaining at the back of the delta ring)
So I then taped up the lenses of the Eotech, and some of the stickers on the PEQ box. I later found that as long as the coating is light there is no real need to cover them up. I then preceded with the second stage which is a tan dusting. I sprayed in sweeping motions about a foot away from the surface and gradually built it up. If you cant see it at first don't blast it full on, it will make it much harder to remove and may ruin the effect if its too thick.
Just after painting.
Close up on how light the coat was.
Other side
Accessories
Another close up with taped over bolt.
The coat should be dry to the touch straight away if done light enough, so it comes off nice and easily for the next part.
I then got straight to work with rubbing it off, re dipped the J cloth in white spirit and got cracking. The paint should naturally stay in places where dust would normally collect, this is where you can decide how dusty you want it too look, with mine I have not left too much, and wanted it to gather in the usual places but also change the surface of the weapons colour to make it more realistic. If you are unsure of how much you want to lave on, don't put so much white spirit on the cloth, as then you can more gradually remove the paint rather than it all coming off and you having to waste paint respraying it.
Right after removing the paint.
Notice the effect it has had on the flat surface a well as where it has gathered and stayed.
I left more in the stock as firstly it was pain in the ass, and secondly it would naturally collect more there because of being rested on the butt, and it being a low contact and usage area.
Other side of the reciever, collected in the trades nicely
Everything put back on.
Another hard to reach place.
"To the sand box and back" look, DONE!
I am very pleased with the result and I hope this guide will help others wanting to do the same. Please post up your results and any thoughts and notes you may find in your attempt.